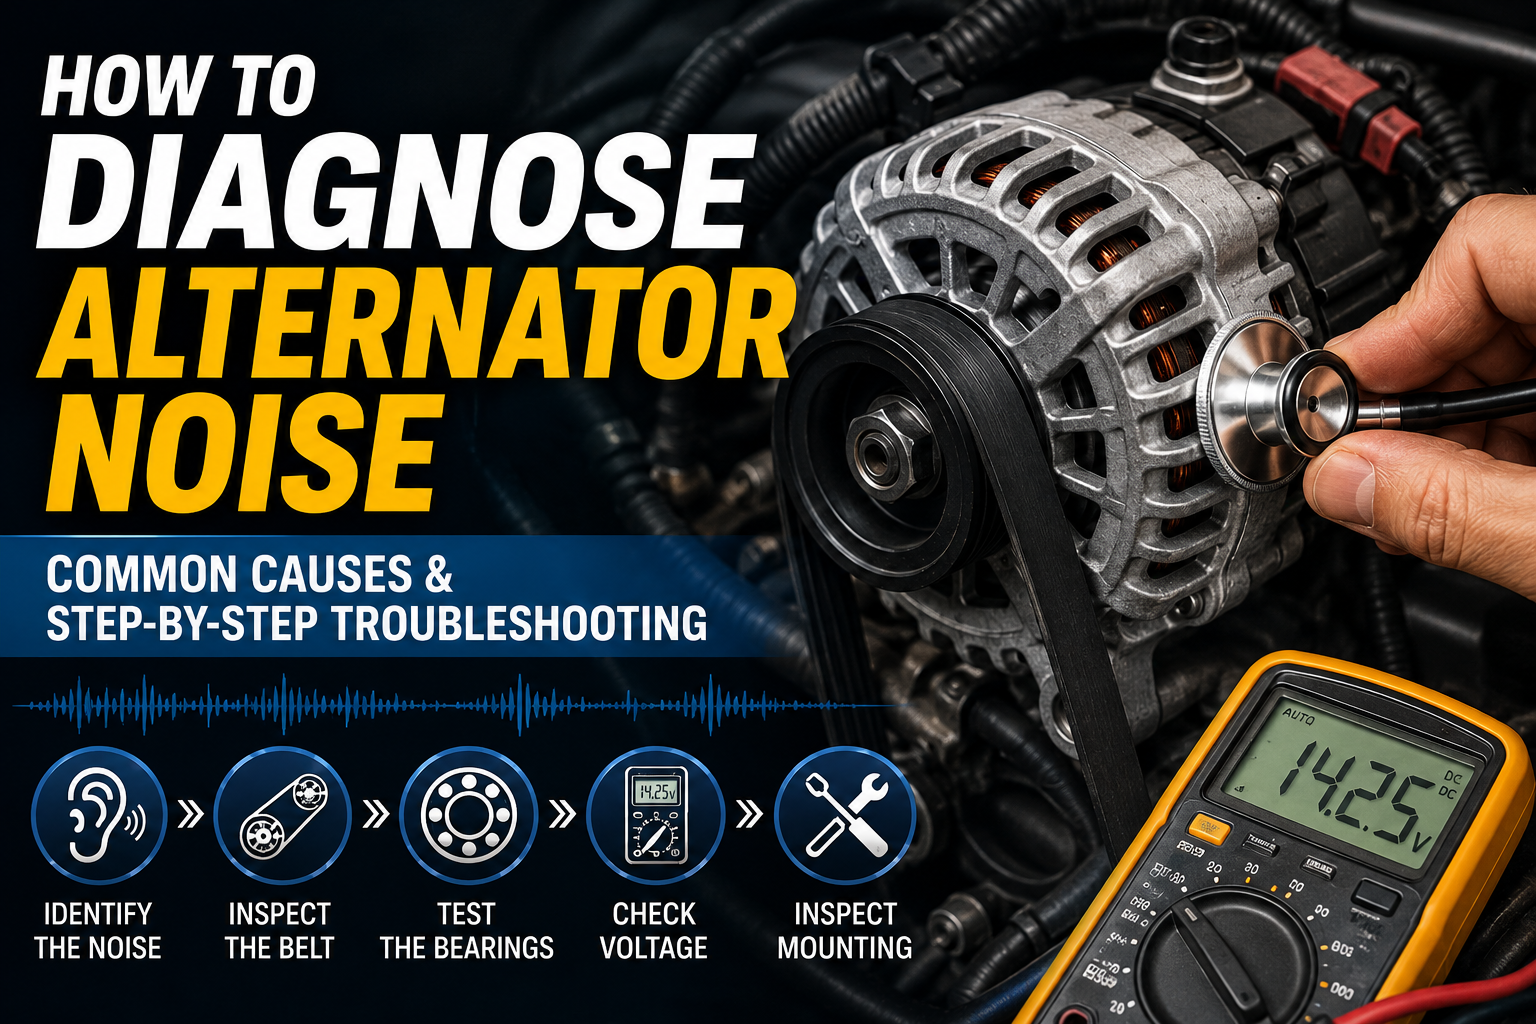
Alternator Noise Diagnosis Guide
Alternator noise can indicate problems with the belt, bearings, pulley, or internal components. In this guide, you'll learn how to identify different noises, locate the source, and diagnose the issue before it leads to charging system failure.
TROUBLESHOOTING
Claire
6/12/20262 min read
Introduction
A noisy alternator is often one of the first warning signs of a charging system problem. Ignoring unusual sounds can lead to charging failure, battery drain, and unexpected vehicle breakdowns.
This guide explains how to identify different alternator noises, locate the source of the problem, and determine whether repair or replacement is necessary.
Why Is My Alternator Making Noise?
Alternator noise can originate from several components, including bearings, pulleys, belts, internal rotating parts, and mounting brackets.
Common sounds include:
Squealing noise
Grinding noise
Humming sound
Clicking or rattling noise
Metal scraping sound
Each sound often points to a different mechanical issue.
Step 1: Identify the Type of Noise
Squealing or Chirping Noise
A high-pitched squeal usually indicates:
Worn serpentine belt
Loose belt tension
Belt contamination
Misaligned pulley
The sound often becomes louder during:
Engine startup
Acceleration
Heavy electrical load
Grinding or Rumbling Noise
A grinding sound often indicates worn alternator bearings.
Symptoms include:
Constant noise while engine is running
Increasing volume with engine speed
Slight vibration around the alternator housing
Damaged bearings should be addressed immediately to prevent rotor damage.
Rattling or Knocking Noise
Loose internal components may create irregular rattling sounds.
Possible causes include:
Loose stator windings
Damaged cooling fan
Worn brushes
Loose mounting hardware
Metal Scraping Noise
Metal-to-metal contact inside the alternator is a serious warning sign.
Possible causes include:
Rotor-to-stator contact
Severe bearing failure
Internal component displacement
Immediate inspection is recommended.
Step 2: Locate the Source of the Noise
Before removing any parts:
Start the engine.
Turn off the air conditioning and audio system.
Open the hood.
Use a mechanic’s stethoscope or a long screwdriver.
Place the tool carefully near:
Alternator housing
Belt tensioner
Idler pulleys
Water pump
This helps determine whether the sound actually comes from the alternator.
Step 3: Inspect the Drive Belt
The belt system is responsible for many noises incorrectly blamed on the alternator.
Check for:
Cracks
Glazing
Fraying
Oil contamination
Uneven wear
Quick Water Test
Lightly spray water on the belt.
If the noise temporarily disappears:
Belt slippage is likely the cause.
Belt replacement or tension adjustment may be required.
Step 4: Test the Alternator Bearings
Remove the drive belt and manually rotate the alternator pulley.
A healthy pulley should:
Rotate smoothly
Produce no grinding noise
Have minimal side play
Signs of bearing failure:
Rough rotation
Grinding sensation
Excessive looseness
Resistance during turning
Step 5: Check Charging Voltage
Noise is sometimes accompanied by charging problems.
Use a multimeter to measure battery voltage:
Engine Off:12.4–12.8V
Idle:13.8–14.8V
2000 RPM:13.8–14.8V
Abnormal voltage may indicate:
Faulty voltage regulator
Damaged rectifier
Internal alternator failure
Step 6: Inspect Mounting Components
A perfectly healthy alternator can still create noise if mounting hardware becomes loose.
Inspect:
Alternator mounting bolts
Brackets
Bushings
Engine mounting points
Loose components can create vibration and resonance that mimic alternator failure.
When Should You Replace the Alternator?
Replacement is usually recommended when:
Bearings have severely failed
Rotor and stator contact occurs
Internal windings are damaged
Charging performance is unstable
Mileage exceeds 100,000 km and multiple components are worn
In many cases, replacing the complete alternator is more cost-effective than extensive repairs.
Conclusion
Alternator noise should never be ignored. Early diagnosis can prevent charging system failure and expensive engine compartment damage.
By inspecting the belt, bearings, pulley system, charging voltage, and mounting hardware, most alternator noise problems can be identified quickly and accurately.
If the alternator shows signs of internal damage, replacing the unit with a high-quality replacement alternator is often the most reliable solution.
Chengdu Fhas Auto Parts Co.,Ltd
Contact Us
Email: fuzhihuiautoparts@gmail.com
Whatsapp: 86-18227678008
Catagory


Policies